
one at school the day of her actual birthday (the day they returned from christmas break).
i don't have any pictures of this one. she just took cookies to school.
one at home the day of her actual birthday.
and
finally, one with her friends, this past saturday.
her actual birthday, not her "pretend" birthday...meaning her friend party, LOL.

i decorated the window with her window markers while she was at school.

our friends, kara & cody came over...bringing their 3 kids (zane, kayleeann & gracie jo).

and we opened her gifts finally. we made her wait...except for one early one the night before. which was a bag of new clothes...so she would have something new to wear to school. it was so hard waiting!!!!!


and while she was at school, i also made her a "from scratch" carrot cake. carrot cake is also my absolute favorite, so i definitely loved the idea she chose this over her other favorite of cheesecake.

however, i think it's so funny that she wouldn't eat the cake part...just the frosting. so turns out, she doesn't like the carrot cake...just the carrot cake FROSTING! funny girl!
for the rest of the week i worked away at her friend party. a migraine for 2 days threw me off a bit, but i got it all done, & down to the very last minute. who's kidding, the very last second, actually!
chloe chose OLIVIA the piglet for her theme. it's her favorite thing right now. and lets just say it is so hard to find decor for it! so i had to improvise & do my own thing.
for her invites i took just an image i found on google image search & plopped it down onto a 4x6 sized image in adobe & added the text about the party. i only printed out one & gave it to her best friends at school (twin girls) & then emailed it to everyone else. saved postage & time.
GOODIE BAGS:

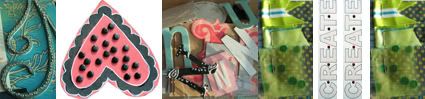
i included: a lipgloss, a beaded art craft from the dollar spot at michael's, a heart notepad from target dollar spot, and a candy bag that i made from coffee filters. i resized an olivia image & put it along with some text to put on the outside of the black sacks...with a strip of red/white stripe paper (like olivia's tights). i then wrote each girls name on the sack as well.
for the candy filled coffee filter treat bags...
(i saw this online somewhere & just tucked it away in my mental file as *to do* for her party...so i don't have the actual link, sorry)
**found the link**

1. take 2 coffee filters and it's best to grab 2 off the pile at the same time *leaving them stuck together* so that you don't have to try & line them up again before you do step 2.
2. using your sewing machine, sew the two filters together to create a pocket, and leave about 1.5" open. i used black thread to tie into the theme of black/white/red.

3. fill with candy. i used m&m's & rolo's. chloe's favorites.
4. fold over the top.

5. create a tag to put on the candy bag. again, i used a clip art image i found online & added text.
6. take a hole punch & while holding the tag & the folded over candy filter bag, punch 2 holes.

7. cut a piece of ribbon, thread thru holes & tie.

so easy!!!!

BIRTHDAY BANNER:

*i made this project over the course of a few days.
1. banner chipboard is from the $1 spot at michael's. they are meant to be for mini albums...but i love them for banners (i made an ocean themed one for aspen last summer using the same thing...but i don't have any pictures of it). i used 3 albums worth.
2. spray paint (the fast way) or paint the chipboard to match your theme.
3. spray paint or paint your chipboard letters saying, "happy birthday"
4. let everything dry completely. i let mine dry for a good day's worth of time. and because i had to work in the basement i just put an old sheet on the concrete floor & opened a window. thank goodness it was last week i had to do this...because it was actually nice out. however, now, it's currently -10! eekk!
5. glue your letters onto the chipboard.
6. using different types/colors of ribbon, or you could use all the same if you'd like, tie all the chipboard pieces together. the pieces at the end are about 24"+ long so you have room to hang.
7. for the 2 end pieces, i printed olivia out on photo paper & then cut her out silhouette style.
8. hang up :) i used clothes pins & attached to the edging of the mantle...i didn't have tape!
** next year, whatever her theme, i will change out the olivia's & ribbon colors. years of enjoyment. i could even use this for brinley & jordan as well. lots of possibilities!!!
PHOTO MANTLE & PHOTO WALL:
if you look at the photo above that i posted for the banner, you will notice i changed out all our photos & put pic's of ONLY chloe thru the years. i didn't print any of these, they were in my EXTRA's box.
also, i have this old crib matress that i spray painted this summer & use it for photos now. just used mini clothes pins & a few bigs to hold them on. I also included some olivia star printables from the nick jr. website as well as the "the cat's meow" printable.

*i also had red, white & black balloons on each end of the mantle...but they didn't show up in the pics! sad.
i also used the printables on nick jr. to print out the straw slides. i was going to print out the paper doll pack & put in the goody bags until i found out it was going to cost $30 just to print the 4 pages for each of her 10 guests! i chose not to include that. but did print it for her to do on her own.
i also made these cupcakes using the red velvet cupcake recipe on nick jr as well. the grocery store where i shop didn't carry a red velvet mix...so i made from scratch just like the recipe. but to save LOADS of time...i would find a mix...i know they make them. so much easier!

so, now, the party...


and thanks to aunt misty (my sister), chloe had her olivia dress from last year that still fit!


No comments:
Post a Comment